 ven though the Sun is usually easy to find (at least during the daytime), obtaining good
photographs of it can be very difficult. If there's a solar eclipse, you might only
get one chance of getting your shot. If you miss it, you may be kicking yourself for
years. This article will help you avoid that fate.
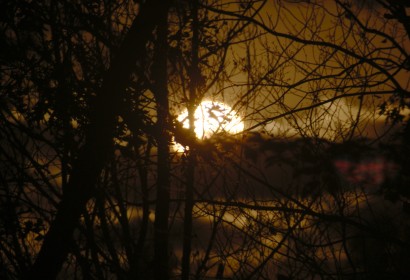
Fig.1. Sunset photographed with an OD=3 neutral density filter (f/5.6, focal length 300 mm, 1/160 sec).
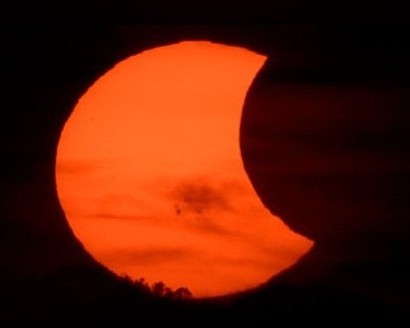
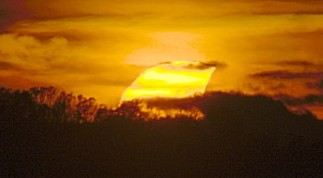
Fig.2. Partial solar eclipse five minutes before sunset. Taken with an R72 infrared filter (f/5.6, focal length 300 mm, 1/500).
First some safety advice. Never look directly at the sun with your naked eye or through the viewfinder. Most of us have played with a magnifying glass as a child, burning leaves and dead bugs with the focused light. Well, that's exactly what would happen to your retina. Always use Live View, not the viewfinder, to focus. Cover the viewfinder with aluminum tape so you don't look through it out of habit.
Telescopes are even more dangerous, and will cause instant blindness if you look at the sun through them. They can also be damaged or destroyed just by pointing them at the Sun. Anything that passes behind it, like your dog walking around, minding its own business, and possibly wondering why smoke is coming out of your scope and why all the humans are acting so strangely, will get very hot indeed.
So, what is a good exposure? There isn't one. Even 1/8000 at f/22 and ISO 100, which is the lowest a typical DSLR will go, is too slow. I took many pictures of the October 23, 2014 eclipse, and the only ones without a filter that were any good were the ones I took after the sun set (Fig.7).
Filters
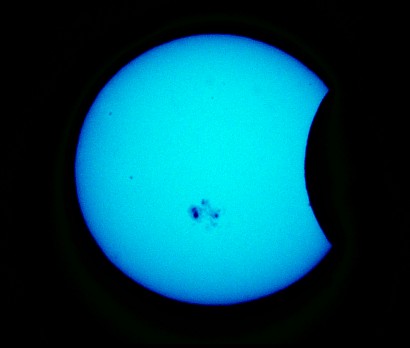
Fig.3. H-alpha red astronomy filter. 1/8000, f/32, 300 mm focal length. Green and blue channels shown.
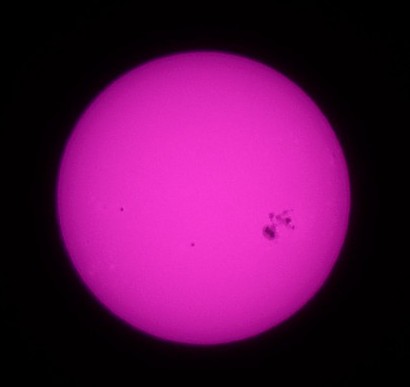
Fig.4. Baader ultraviolet filter. 1/1000, f/5.6, 300 mm focal length. This photo was taken a day later, so the Sun has rotated. Because sunspots are cooler than the rest of the Sun, they show up in near-ultraviolet well. Sunspot AR2192 is visible at the center right.
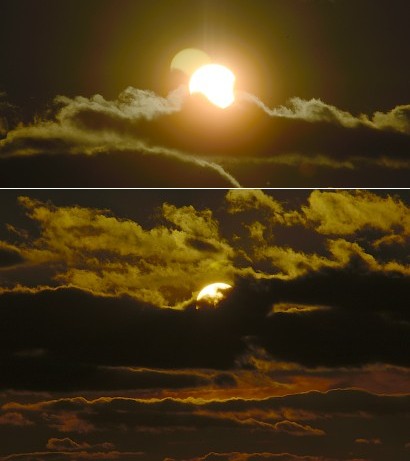
Fig.5. Frontal lens flare is always present, but becomes objectionable when the object is too bright (no filter, f/32, 300 mm. Top: 1/8000, Bottom: 1/2500).
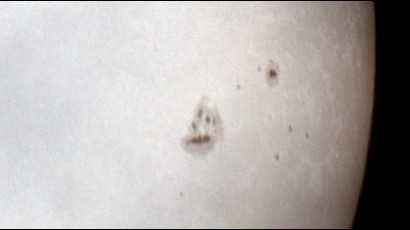
Fig.6. Sunspots photographed with a 8 inch SCT (resized). A big aluminized mylar energy-reducing filter on the front of the telescope is essential, and all finders, including your red dot finder, should be removed and hidden away in a box. For this photo, a Ca-K / Ca-H near-ultraviolet interference filter was used at the back between the telescope and the camera. Faculae are barely visible as white splotches. The dark area at the left is a cloud.
For these eclipse photos, I used an unmodified Nikon D7000 with a Nikkor VR 18–300mm f/3.5–5.6G zoom lens set to 300 mm, focus mode manual, ISO 100.
| Filter | Exposure time | Aperture | Result |
|---|---|---|---|
| R72 (Infrared) | 1/2500 | f/5.6 | Red channel overexposed |
| H-alpha | 1/8000 | f/32 | Better sunspots |
| X-Nite BPG | 1/640 | f/5.6 | Sharp, better than R72 |
| Baader U-filter | 1/1000 | f/5.6 | Excellent sunspots |
The standard advice for photographing the Sun is to use an OD=3 or 4 neutral density filter. This works, but the images generally appear brown (Fig.1), and little detail is visible on the Sun. An alternative is to use an infrared or ultraviolet filter. Most of the energy that gets through is blocked by the camera's internal filters, so you get darkening as a side-effect, while the spectral features that make the Sun interesting are accentuated. So, how well do they work?
The first one I tried, an R72 infrared filter, was not successful. It made the sun appear bright orange, and the red channel was mostly saturated, which made the Sun look like a flat disk (Fig.2). If the camera had been modified for infrared, it would have been even worse.
A 7nm H-alpha filter made the photos come out bright pink, and the red channel was 100% saturated even with the exposure as fast as I could get it. But the blue and green channels showed beautiful sunspots, and limb darkening was preserved, which gives it a spherical appearance (Fig.3). Putting a dark neutral-density filter on top of the H-alpha filter might have improved it even more, but stacked filters means more risk of lens flare.
An X-Nite BPG 796–877 nm infrared filter gave sharp, pink images with 1/640 second exposure, but no particular improvement over a neutral density filter.
Since sunspots are cooler than the rest of the sun, they should show up better in ultraviolet. A Baader U-filter, which transmits ultraviolet between 300 and 400 nm, confirmed this, and gave the best results. Many faint bright areas, known as faculae, also showed up in ultraviolet (Fig.4). The lens glass absorbs most of the UV; from this graph the peak λ transmitted by the filter is about 385 nm. This region includes the calcium Ca-K and Ca-H lines at 393.4 and 396.8 nm, but the filter is not narrow enough to block the continuum completely.
The problem with all filters is lens flare (Fig.5), where light reflects off the front of your lens and both flat surfaces of the filter. This type of lens flare is always present, but it's only noticeable when you expose long enough to saturate part of the image. Some people eliminate flare by taking a second photo with their thumb blocking the sun, then combining the two in Photoshop. That might work, but I suspect it would look fake. If you want the background to show, it's better to take a 14-bit image and raise the gamma. If you get the Sun exactly in the center of the picture, the reflection is superimposed on the Sun. But that's not easy to do.
For comparison, Fig.6 shows a photo taken with a small telescope. It's definitely sharper, but not dramatically better. There were clouds passing in front of the Sun when I took this picture. A mylar energy-reducing filter is essential. If you have a finder scope, it should be removed and put in a box somewhere.
The best pictures were taken after the Sun set (Fig.7). Clearly, then, the best solution is to keep the Sun out of the picture altogether. Admittedly, this somewhat defeats the purpose of taking a picture of the Sun, but your camera will be much happier.
Other Suggestions
Always save images in 12- or 14-bit Raw or Tiff format, not Jpeg, to avoid Jpeg artifacts around the edge. And make sure you have an extra battery. Use the highest magnification available. It might sound counterintuitive, but you also should use a fast lens, because it will have a bigger diameter. A bigger diameter lens will give you more resolution, but of course it will also be harder to block the excess light.
The most important item to take with you is a heavy towel—otherwise, it can be very difficult to see the LCD screen, which you must use to focus.
Never trust a filter unless you know its absorption spectrum. Tinted acrylic plastic, for example, may darken the image visually, but most of it is nearly transparent in the near infrared. That energy can blind you even if you can't see it.
Expensive Solutions
With ordinary filters, you can see sunspots, but not flares, prominences, spicules, filaments, or coronal mass ejections.
Those beautiful photos you see on the Internet are taken with special solar telescopes, which have combinations of an energy-rejection filter in the front of the scope and a narrowband (<0.7A) 6562.8 Å H-alpha filter in the back. These are not really filters, but Fabry-Pérot interferometers, or etalons, which consist of two highly accurate parallel mirrors. The tilt of the etalon can be adjusted to select the wavelength to adjust for temperature and for differences in the refractive index of the air that occur with increasing altitude. There are two types: single and double-stack. Double stacking reduces the bandpass to 0.5A, which reduces the background from the thermal continuum, but the images are also dimmer and they are twice as expensive. These Fabry-Perot filters aren't as good as the Lyot filters and magneto-optical filters used by professional astronomers, but they're much better than interference filters.
The H-alpha line is normally about 0.6A (0.06 nm) wide, but can be over 10A wide in a flare. Doppler shifts of prominences are around 0.5–1A (25–50 km/sec). With an ultra-narrow bandpass filter, it's necessary to correct for this Doppler shifting. Since everything on the Sun is moving, you can filter out parts that aren't moving toward you by adjusting the etalon. This lets you take photographs of the chromosphere that just can't be seen otherwise.
Some astronomers say the Sun might be heading into a Maunder minimum. If so, we might not get any more sunspots for years. On the bright side, in 5.4 billion years the Sun will turn into a red giant. We will get some really great close-up pictures of the sun then, even with an ordinary lens!
One last reminder: never look up at an eclipse, or you could drown.
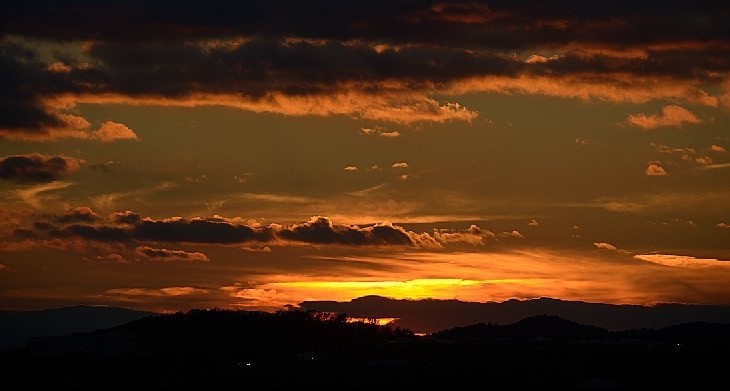
Fig.7. Ten minutes after sunset, no filter, 1/400 sec, f/5.6, 145 mm focal length. The small white dots are not stuck pixels, but car headlights in the distance.
