 he papers are full of sad stories about people who missed the giant,
spectacular, amazing auroras on May 10, 2024. One story says there were a
hundred cars bunched up in a parking lot the day after, but they missed it
by a day and also the sky was overcast. They shouldn't feel bad. Without
a camera, an aurora is usually little more than a faint greenish gray glow
in the sky. I almost missed it myself.
I'm experienced in astrophotography, but no expert on auroras: at 38° latitude, we rarely get them. There are some advantages of this latitude. For instance, Sirius is actually sometimes above the horizon. But it takes a major storm to give us an aurora.
Auroras generally last only an hour. These photos were taken between 10:00 and 11:00 pm Eastern Daylight Time. At 9:40 there was nothing. Photos at 10:00 showed nothing much, just a faint green. By 10:03, structure and red were visible. By 10:10 they were spectacular. By 11:00 all that remained was a very faint red glow in the north.
Tip 1: Don't ignore green in the sky
Astrophotographers generally ignore green because mercury vapor lamps create a green haze, so it's necessary to practice many times to become familiar with the light pollution in your area. Where I live, there are massive floodlights that ruined every picture taken anywhere near one. And we have far too many trees.
I took the first photo by accident. Nothing much was visible to the naked eye. If I hadn't pointed it up at a 45-degree angle to avoid those giant floodlights my neighbors have, I would have thought there was no aurora that day.
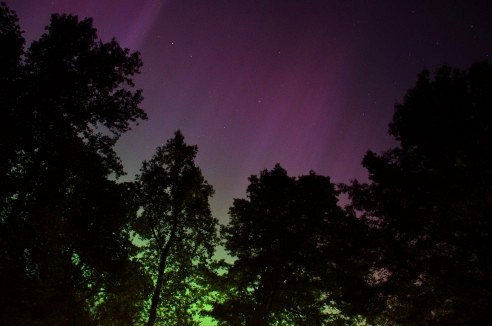
10:03 pm, f/5, 18 mm, 5 sec, ISO 1000, pointing due north and 45° up. Brightness increased by 30%
Tip 2: Look west and southwest
I almost missed this one, not realizing that auroras aren't always at the north. While walking around trying to get my eyes re-adapted after being dazzled by my neighbors' industrial-grade floodlights, I noticed an intense pink and white streak directly overhead, plainly visible to the eye, coming out of the west.
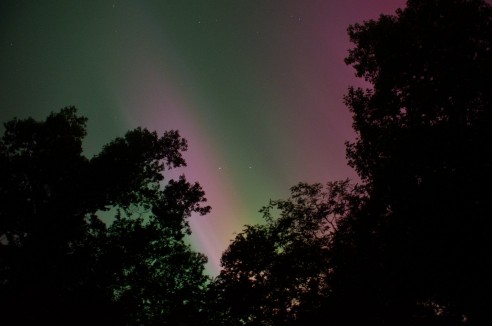
10:07 pm, f/5, 18 mm, 4.7 sec, ISO 1000, pointing west-southwest
Here's another shot of the aurora facing west. Auroras move, but too slowly for the eye to see. Next time I'll set up a time exposure for ten-second intervals.
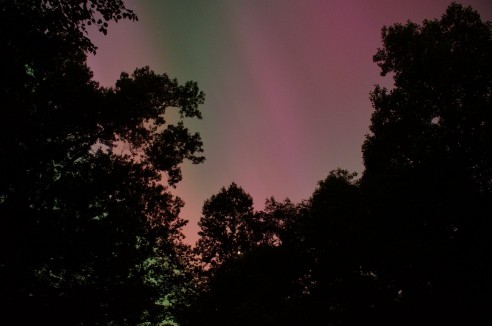
10:08 pm, f/5, 18 mm, 5 sec, ISO 1000, pointing west-southwest
Tip 3: Getting the crescent Moon in the photo is tough
It's necessary to zoom and reduce the exposure when including the Moon, otherwise you just get a giant white blob. But at higher zoom, you won't see any structure in the aurora. The aurora was now orange, which means green and red emissions were both present. That's hard to distinguish from the brown sky you'd get from light pollution, especially in the old days of sodium vapor lamps. Notice the brilliant pink band has already faded away.
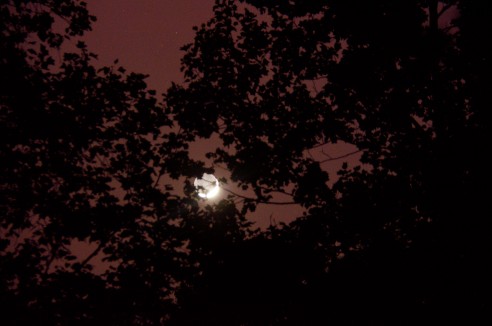
10:15 pm, f/5.6, 120 mm, 2 sec, ISO 1000, pointing west
Tip 4: Use a long exposure and a wide lens
As you look south, we get orange, which could be mistaken for sunset. It's a mixture of red and green, which happens at lower altitudes. This photo was only done for two seconds. Even though the lens was set to f/3.5 the exposure was not long enough and graininess is apparent. All these images were saved in 14-bit RAW format. This helps, but nothing can really save a truly terrible photo.
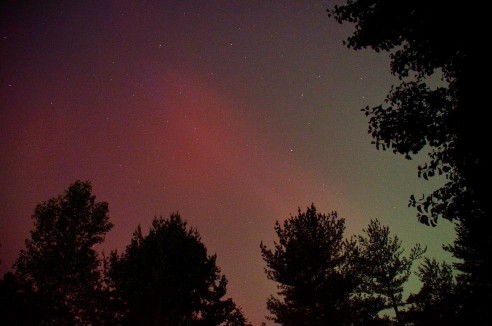
10:43 pm, f/3.5, 18 mm, 2 sec, ISO 1000, pointing south
Tip 5: Aurora spectra are narrow emission lines
Auroral electrons and photoelectrons collide with gases in the upper atmosphere, creating excited states which then decay, releasing photons at a specific wavelength. The emission lines are narrow because the air pressure in the ionosphere is so low.
Here's what the colors mean: Monoatomic oxygen (O) has two spectral lines in the red (630.03 and 636.38 nm) due to spontaneous de-excitation[1] and one in the green (557.734 nm). Deep red is nitrogen (N2, 630–680 nm).
Deep blue (427 nm) is ionized nitrogen (N+2). It's a different shade of blue than you'd get from the twilight sky or the Moon. It's at the highest altitude where ionized nitrogen is present, and it's said to be rare. See here for a nice spectrum.
Many other electronic transitions have been found in the aurora, including emission lines for O, O+, N, and N+ (OI, OII, NI, and NII in the old notation). In the plasmasphere, a region of cold plasma between about 1000–10,000 km, there are many other ions, including H+, He+, O2+, and N2+. Many of these ions emit light in the ultraviolet or infrared.
If someone invented an affordable multi-wavelength filter, we'd be able to capture truly amazing aurora pictures.
Facing north again, and pointing the camera over a blacked-out house, we get orange, magenta, purple, and blue.
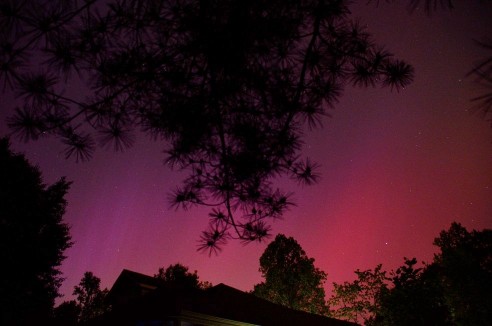
10:46 pm, f/3.5, 18 mm, 2 sec, ISO 1000, pointing north
Point of interest: Atmospheric physicists say the blue sky after sunset is not Rayleigh scattering like the blue daytime sky as most people think, but actual blue pigment from the ozone layer; ozone absorbs red light.
Facing northwest, more structure is now visible. The naked eye just sees a faint gray, but the camera shows a deep red.
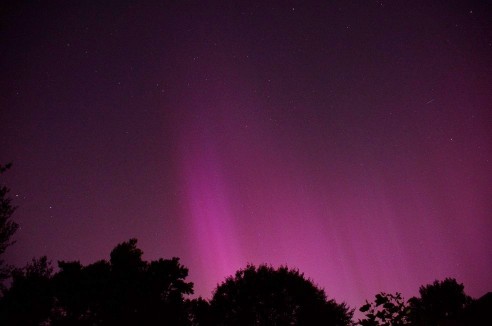
10:51 pm, f/3.5, 18 mm, 2 sec, ISO 1000, pointing northwest
Tip 6: How far up is an aurora?
Auroras are between 80 and 250 km in altitude. So, if you're at sea level, you'd have to be closer than 1198 miles to see the top and 628 miles to see the bottom of it, assuming no obstacles like terrain, clouds, haze, or trees in the way and an infinitely bright aurora (approximately—every formula gives a different result, the Earth isn't a perfect sphere, and refraction increases the distance by up to 20%). Add 38 miles to these distances for every 1000 feet of your altitude. Of course, auroras are quite dim—they're hard to see when they're right overhead, let alone a thousand miles away—so you'd need to be a lot closer than 600 miles to actually see them.
At low altitudes, molecules lose their energy by collisions with other molecules (which generate heat) instead of emitting light. This is one reason the oxygen red line is only seen above 150 km. Another is that there is very little monoatomic oxygen below 100 km.
Equipment
Ideally use a DSLR or something equivalent. A cell phone is no good unless it has a time-exposure mode. You also need a tripod and a remote shutter.
In some photos I used an 18–300 mm zoom lens and 1–2 second exposure. This was a mistake, as many of the images came out grainy. Next time I'll use a f/1.2 lens and expose at least 10 seconds. That means guessing what they'll look like, as the image preview on my Nikon changes the brightness, concealing the fact that the image is too dark. A histogram helps but it's tough to get rid of in the dark.
Auroras are quite big. These images were mostly taken at 18 mm, so not much of the structure can be seen. A wide-angle lens would have been better.
Photoshopping
Sometimes people take two pictures at different exposures and photoshop a foreground with something interesting onto the image. This gives the picture a sense of scale, but using Photoshop on an image seems like dishonesty to me. A slightly less dishonest way is to flash a dim light briefly on the foreground while the camera is exposing.
Faking astrophotographs is unfortunately common. For example, a comet moves rapidly against the background of stars, so a time exposure would show the stars as long streaks, which confuses people. That's why many people process the image with a special program that “fixes” the streaks, but the eye recognizes it as photographic trickery and concludes the whole picture looks as fake as an HDR photo.
[1] Schunk R, Nagy A. Ionospheres: Physics, Plasma Physics, and Chemistry, 2e, p. 233.
may 13 2024, 12:18 pm. updated may 15 2024, 5:08 am
