 his month, Mars is only 35.8 million miles away. That's the closest it's been since 2003,
when it was only 34.6 million miles away. It won't be that close again until 2287. But
for amateur astronomers, it's been mostly a bust, thanks to a planet-wide dust storm
that turned Mars into a featureless orange ball. To make things worse, for those
of us way up north, Mars was barely above the horizon. In this article I'll
answer the question of which is better: a DSLR camera or a webcam?
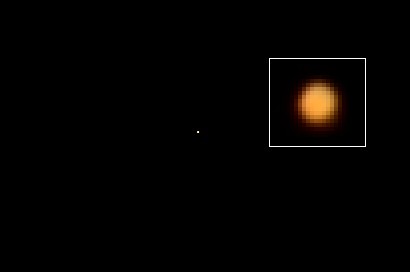
Fig. 1. Your basic Mazz is one of your smaller planets—only 11 pixels across here. Mars is seen here through a 300 mm zoom lens (full image, resized). Inset: full-size image, enlarged 4×.
No matter which you use, invariably with a new location the first day is spent finding problems: there may be tree branches in the way, pieces of equipment falling off, or vicious man-eating raccoons. There's not much you can do about the raccoons, but for equipment the best strategy is to assemble everything during the daytime and practice photographing Mars-like rocks until you can do it blindfolded.
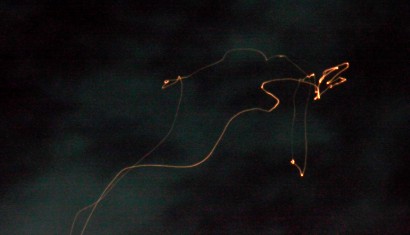
Fig. 2. Try not to bump the mount while shutter is open
One important step is to make sure your finder scope lines up exactly with
the field of view in your telescope. Otherwise, you can easily lose twenty minutes trying
to find the target. Another is to discover any weird quirks that prevent your
equipment from working. On my telescope mount, for example, the
Left button doesn't shut off until I press Right.
You need to know these things in advance.
Cell phones and Zoom Lenses
You might think that cell phones, with their tiny pixels, would be ideal for photographing planets, but they're not. Their low-light capability is poor, and it's tough to attach them to a telescope. Without a telescope, all you'll see is a tiny orange dot (or, if your phone randomly jumps to selfie mode, as mine does, a picture of yourself in the dark looking frustrated.)
A DSLR with a zoom lens isn't much better. Fig. 1 shows what you can expect with a zoom lens. Stacking images this small would be an exercise in futility. It's better to use a telescope.
Procedure
Here's an overview of the steps:- Get the equipment working in the daytime.
- Program your brain to wake you up at least 30 minutes before the planet will come into view. If your brain doesn't have an auto-wake feature, use an alarm clock.
- Set up the equipment and find the object. Check on the Internet what else is up there, so you don't photograph, say, Jupiter by mistake, which would be pret-ty embarrassing. A planisphere will convert the RA (right ascension) and Declination listed in ephemeris tables to hours.
- Capture a movie (at least 3–5 minutes), being careful not to overexpose. Overexposing the red channel on Mars happens a lot, and it makes the image unusable. Use the histogram feature on the camera to make sure that doesn't happen.
- Stack the frames on the computer (see below). This is the most time-consuming step, but it's essential because the Earth's atmosphere makes it as if we're observing Mars from inside a boiling cauldron.
- Process the final image.
DSLR
For a DSLR (the example I'm using is a Nikon D7000), there are two ways of setting the exposure: automatic and manual. In automatic mode, set the exposure compensation (+/− button) to −2 or −3 so the movie is not overexposed. In manual mode, it uses whatever ISO and exposure times you've selected for a still photo.

Fig. 3. Attaching DSLR camera to telescope. The light shield is a macro extension tube with some black felt stuck on the inside. Depending on the ambient light, it might not be needed. The threaded knob fits through a slot that allows the camera to be moved back and forth for different eyepieces.
Attaching the camera directly to the telescope, as you'd do for galaxies, doesn't give enough magnification. One solution is to mount the camera behind a high-power eyepiece. I made an adapter from some scrap wood, a 2-inch i.d. white PVC fitting from a hardware store, a piece of 2-inch o.d. steel tube from an old torchiere lamp, and a 6.7-mm telescope eyepiece (Fig. 3).
Note that a DSLR camera is used without a lens. However you attach it, the setup must be rigid but easy to disassemble in the dark. It's often necessary to use a low-power eyepiece first, then switch to a higher power once the planet is centered and in focus.
Webcam
Webcam image sensors have smaller pixels than DSLRs, so you can get bigger images, but the image quality is not as good, and you have to set the exposure and brightness using sliders, which are inexact. I tested a Logitech c920 webcam, which does 1080p and has an autofocusing glass lens built in. At 30 frames/second, it's the same speed as the c270, which is my old standby webcam for detecting radioactivity. High frame rate (200 fps) cameras are available from optics vendors, but they can cost up to $4,000.
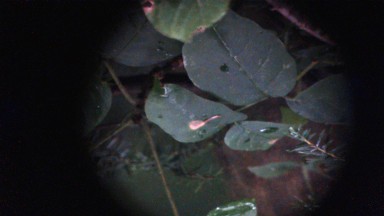
Fig. 4. Typical ‘Martian’ scene taken with a webcam through 8-inch telescope with 6.7 mm eyepiece. It bears a remarkable resemblance to one of your Earth bushes as if it were only 50 meters away from the camera.
To get the webcam working, you have to use a Windows computer and download a massive amount of software to control it. The c920 has a 1/4"-20 screw hole which lets it attach to a mount like a DSLR. Unlike with a DSLR, you leave the lens attached. With a 6.7 mm eyepiece, the image only filled part of the sensor. Fig. 4 shows an image of a bush from 50 meters away. Note that it's upside-down, and you'll have to flip it.
Stacking frames in Registax
Nikon cameras create .MOV files, which Registax can't read. To convert them, use
ffmpeg. It's a command-line program, which means (if you're using
Windows) you run cmd.exe and type the command in the black text box.
ffmpeg -i DSC_1313.MOV -strict -2 test.avi
If the filename contains a space, put it in quotes:
ffmpeg -i "Video 21.mp4" -strict -2 test.avi
Registax is quite
an old program, but it still works. The latest version is a bit faster, but is otherwise
the same. Click Select and select the movie
file. Wait until it says “File cannot be loaded,” then wait until the preview
shows up. Then click OK. It should load the movie file. If not, sometimes trying it
a second time succeeds. You can also load sets of image files by dragging them
en masse to the window.
Drag the slider at the bottom to make sure the planet stayed
in frame throughout the movie. Then set some alignment points by clicking on the edge
of the image of the planet.
Click on Number of Alignpoints to give the software the number.
Click Align. It should draw a graph showing the registration.
Click Limit Setup to Best Frames and change the value to
about 1/2 or 3/4 of the total number of frames.
If you get a blank screen, it means you need to use different parameters.
Finally, click Stack. It should say “Start Multicore Stacking frames”.
The software will take several minutes to align them. If you get a black screen at the
end, it means you need different parameters. If you get a result, click
Save Image.
Registax has a nice feature of keeping the result at the original 48 bits/pixel when processing TIFF files. This makes deconvoluting them a lot easier. But AS2 can handle more TIFF files without grinding to a halt. For both programs, it was necessary to laboriously crop and align the TIFF images manually before starting, or the software would hang.
Webcam problems in Registax
Registax couldn't open any of the movies made by my Logitech c920. I created movies using several combinations of exposures and brightness and converted them to AVI format using Linux ffmpeg; only a few of them stacked correctly in Registax.
Stacking frames in Autostakkert! 2.6.8 (AS2)
Autostakkert!2 is a newer program and is quickly becoming the preferred way of stacking planet images. The manual is here. You'll likely need to have the Windows version of ffmpeg installed before Autostakkert can open your movie file. AS2 is freeware, so there are some quirks. For example, Autostakkert has no concept of error messages. If it can't open your movie, it just does nothing.
-
Click 1) Open and select
Files of Type = Others (Requires FFmpeg). A very convenient feature is that groups of TIFF files can be dragged onto the display window. - Click 2) Analyse. Set Image Stabilization to ‘planet’ and set Quality Estimator to ‘Edge’. For large objects like Jupiter, select Gradient instead. It will run for a while, seemingly doing nothing. Maybe it's smoking a cigarette just to look busy. There are no luxuries like fancy high-falutin' “progress bars” here.
- Create alignment points (see below).
- Click 3) Stack (see below).
To create alignment points, click at several points on the image of your planet (not on
the edge of it, unless the planet is a crescent). If you create a dot in the wrong place,
right-click to remove it. AP Size makes the boxes smaller, which
is good if your image has small details.
When you click Stack,
it will stack the frames and put the result in a folder such as AS_p50 and give it a
descriptive filename. It's recommended to select PNG as the stack option, as not all
software can read the TIFF files that AS2 produces. (Yes, there are multiple types of
TIFF files, all different.)
Don't worry about the quality of the planet displayed on the screen. It's only there to show you what the program is doing. The actual result is saved in a file.
Webcam problems in Autostakkert!2
AS2 easily imported movies from a Nikon D7000, but couldn't read any of the movie files
from a Nikon D90, and it converted the mp4 files from the webcam to grayscale unless
I selected Color → RGB to force it to use color. AS2 hung on a few
movies, but in general it was more robust than Registax.
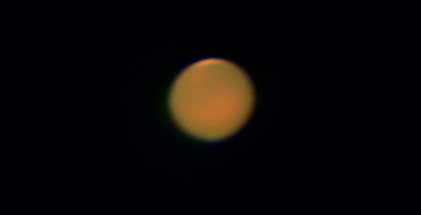
Fig. 5. Mars photographed through an 8-inch telescope using a D7000 in movie mode and stacked with AS2 (drizzle off). The movie was shot on August 06, 2018, while Mars was having a suspiciously convenient planet-wide dust storm.

Fig. 6. Mars (Aug. 10, 2018) stacked from a webcam movie with Registax (total of 7951 frames).
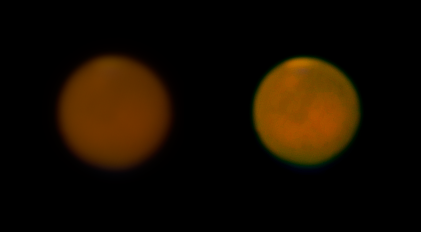
Fig. 7. Mars (Aug. 6, 2018) stacked from 6 16-bit-per-channel TIFF files from a D7000 DSLR camera using AS2. Left: stacked image Right: After deconvolution in Imal. (1:41 am; camera settings: 14-bit RAW mode, ISO 100, 1/6 sec, WB Sunlight, NR off, Exposure comp −0.7EV.)
Post-processing
At this point your planet image will be smooth but still fuzzy. The last step is to sharpen it with a Gaussian filter or by Richardson-Lucy deconvolution. For that, you need a deconvolution kernel image, like this one. If your image shows chromatic aberration or other optical distortions, here is where you would fix it. I use Imal, a Linux-only program, to do all this, but there are many others.
Results
Fig. 5 shows Mars photographed with a D7000 DSLR. The image was stacked by AS2 from a MOV file containing 1200 frames. Mars was having a planet-wide dust storm, so it looks almost completely orange. Is it just a coincidence that just as the Martians get close enough to observe, they suddenly get a planetary “dust storm”? Shyeah, right. Too convenient if you ask me.
Fig. 6 shows Mars shot with a webcam and stacked with Registax. Fig. 7 shows Mars stacked from collection of 6 4928×3264 pixel still shots from a D7000 DSLR (in 14-bit RAW mode) processed with AS2.
Conclusion
Even though everyone else says webcams are better, I got better results with a DSLR in movie mode than with a webcam. Still photos gave even better results, mainly because the DSLR can save images with 14 bits of pixel depth per channel (as opposed to 8 for a webcam), which allows you to process the result more heavily. Your mileage may vary.
Compared to what I got six years ago, the results were disappointing. Mars was just too darn close this time. I'll have to wait until it gets farther away.
aug 12 2018, 5:09 am; Fig 2 added sep 12 2018, 5:21 am
