If you have a digital camera, DVD player, or some other device with an HDMI port and need to make a backup copy on your computer, the easiest solution is an inexpensive external box like the ezCap or USB3.0 V316b HDMI Video Capture box. It requires a USB3 port on your PC, which provides power, and of course an HDMI cable. The USB3.0 box is the most popular and it works well.
It's probably not worth becoming dependent on this, as the industry has for some inscrutable reason invented HDCP, which is an encrypted form of HDMI designed to prevent copying. Since people use these boxes only when there's no alternative, HDCP would block you from using your own equipment. It would also incentivize the industry to switch to something different. The Supreme Court would have to step in as they did with VCRs.

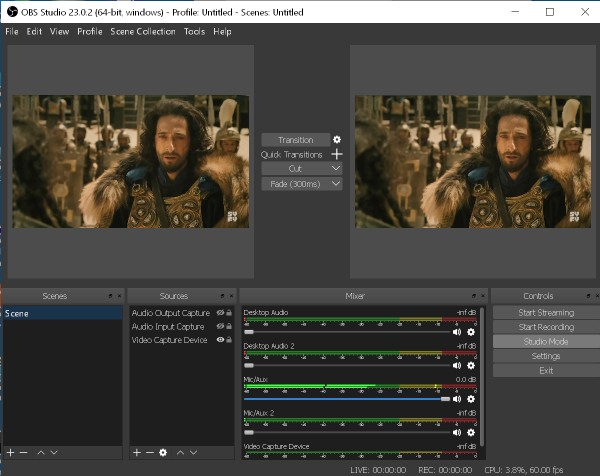
Screenshot of OBS in studio mode (resized to 50%). Note that an extra Audio Output Capture source, two extra Desktop Audio sound level meters, and an extra Mic/Aux meter are visible. These have to be deactivated. If that's not possible, set the volume to 0. Video Capture device doesn't show the level. I could have removed these extra sound level bars, but the Golden Rule of Computers says: if it's working, don't touch anything.
HDMI Cables
Both the connector and the wire in a cable determine the maximum bandwidth.
As of 2025, there are three types of HDMI Cables: Type A (13.8 × 4.45 mm), Type C (mini, 10.42 × 2.42 mm), and Type D (micro, 5.8 × 2.2 mm). Needless to say, the cable is usually not labeled other than to say "high speed" and the connector is never labeled, so you need a ruler to distinguish them. These boxes all came with Type A cables.
There are also many types of USB cables. These are usually labeled as "high speed USB revision 3.0". The computer often (but not always) designates USB3 with a blue color or the label "SS". There are five types of USB connectors: A, B, C, mini, and micro. Type C can provide more power, so it's often used as a power source on laptops. A cable with USB-A connectors came with the USB3.0 box.
It might sound complicated, but most people are just happy they're not using SCSI anymore. There were at least 11 incompatible connectors, which means there were 121 possible SCSI adapters, not counting terminators.

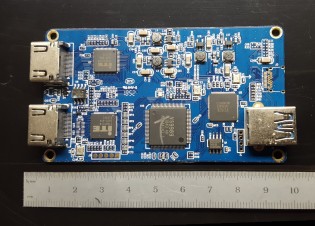
Circuit board of an EZcap 261
Windows
The procedure below worked on a Lenovo Thinkpad X1 Carbon laptop and an old HP Pavilion H8-1234. To get 1920×1080 (1080p) resolution at 60 frames / second, you need a reasonably fast computer. Even the HP (which was quite old) was able to handle 1080p, but only at 30 fps and the system load was running at 47%. The laptop was more powerful and never exceeded 5% even at 60 fps. Old ezCap devices could only do 1280×720 at 10 fps, but newer ones might have an improved BIOS. Their main advantage was that the green light blinks green and yellow if the data rate is too fast for it.
The biggest obstacle was the Windows 10 operating system. You need to go into Settings and allow “Apps”, by which Windows means programs, to access the microphone. In the Carbon, you also have to hit F4, which toggles access to audio input.
Connect an HDMI cable from the source to the HDMI input port on the USB3.0 box. No audio cable is needed unless you want to use a microphone. A camera will have a small size HDMI port, which means you need either an adapter or a special cable.
(Optional) Connect a second HDMI cable to the HDMI output port to your TV.
Connect a USB-3 M-M cable from the box to a USB3 port on your computer.
Install OBS Studio. This software seems to be used by many different vendors. I tested versions 31.0.2, 31.0.3, and 23.0.2. All three worked, though the older one had bad fonts and the newer one crashed a few times during setup. Surprisingly, they all installed in Windows 7 and 10.
In OBS, click on Sources and add a Video Source and Audio Source. Configure them as necessary.
In Windows Settings / System / Sound, set Input Device to Digital Audio Interface (USB 3.0 Audio). You should be seeing the tiny blue sound level bar underneath it moving. If not, click on Microphone Privacy Settings and turn on "Allow apps to access your microphone." It might be necessary to turn on the specific app permissions below this. It will also show obs64.exe if you've installed it.
If using a Thinkpad X1, hit F4 so the microphone icon on the screen changes to "on". None of these Windows steps were necessary in Windows 7, only Windows 10.
In OBS Settings, set mic/auxiliary audio device to USB3.0. Disable all the others including Desktop audio device.
At this point, you should see the sound level bar moving in OBS and hear sound coming from your PC's speakers.
In OBS, set file quality to High Resolution ("Indistinguishable"). Set the file format to MKV. This gives better resolution than FLV. To view an FLV file you'd need to install VNC viewer, as Windows Media Player can't handle it.
For 1900 × 1080, FLV took 14 MB disk space per minute at low resolution and 22 at high resolution. MKV took 30 MB at high resolution.

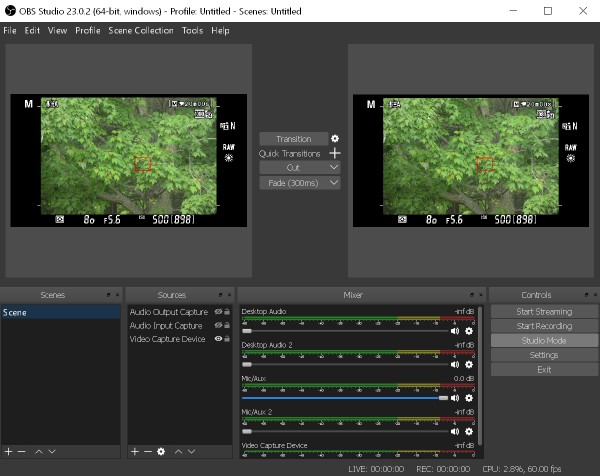
Screenshot of OBS from DSLR camera (resized to 50%). The HDMI output has much higher resolution than the LED screen in the camera, making it easier to focus. It also saves time transferring videos. Turn off the camera before attaching the HDMI cable
Troubleshooting
More than one sound bar is active in OBS Sometimes you might end up with Desktop, Desktop2, and microphone all showing. You have to disable all but one, otherwise you'll get echoes in your output file.
Black screen in OBS video display This happens in version 31 when you change an option. If re-starting the program doesn't help, create a new Scene and add the video and audio sections again. Or, uninstall OBS and re-install it.
Purple screen in OBS video display This means your device isn't compatible with the software. The ezCAP did this. For slower computers, try reducing the screen resolution and fps settings.
No sound level meter display This means your file will be recorded without sound. The most likely cause is that Windows Privacy settings are blocking it.
Task Bar In the laptop, it was necessary to unlock the Windows Task Bar and drag it to the right before the entire OBS menu became visible.
Crashing OBS 31 crashed often when changing settings. The older version was more stable.
The golden rule in computers Thou shalt not touch anything on the computer while it's working. For lo, thou shall surely break something, and there will be much gnashing of teeth.
Linux
I didn't try running it in Linux. OBS Studio also claims to work in Linux, but requires Flatpack, which many people dislike. Here is a page that claims to have an HDMI-USB-Dongle Module that can work in Linux. It also requires snapd and requires a few commands, specific for a wide variety of Linux distros. In general, they look like this:
 sudo snap connect hdmi-usb-dongle:camera

 sudo snap connect hdmi-usb-dongle:hardware-observe

 sudo snap connect hdmi-usb-dongle:audio-record
may 09 2025. updated may 15, 2025
