Using Imal in Windows
There are two ways of running the imal image analysis software in Windows: using a Linux emulator or running it over the network. If you have a Linux server on your network, and your images reside there, run it over the network using Xming. If not, use an emulator such as andLinux.
I. Running Imal Over the Network
The easiest way is to install Imal on a server and run it over the network. With this method, you don't have to learn Unix commands, and you only have to install a small X11 emulator on the Windows machine. It also has the advantage that you can run the latest and greatest version of imal with all the spiffy new features. The only drawback is tyat you need to have a working Linux system somewhere on your network. There also has to be a working Samba or NFS setup to access your image files. If your server is running Linux, this has almost certainly been installed already.
If you don't have a Linux system running on your network, scroll down to the middle of this page to where it says "Using andLinux."
Windows users - setup
Although Imal is a Linux application, it is easy to run it from your Windows PC. The display shows up on your Windows desktop, but all the number crunching is done on the server, which is faster and more powerful. All the software needed to set this up is free; however, you will need to dedicate one computer to running Linux.
We run Imal over the network routinely. If you have a fast server, the display updates are actually faster than if you run it locally, because image analysis is computationally intensive. We get excellent performance from OpenSUSE Linux on a HP Proliant DL380 G5. This computer is extremely fast, but it should be kept in a wire closet because it's a bit noisy.
Seven steps (described in detail below) are needed to run imal:
- Set up a Linux server running Imal on your local network. Ideally, this server should be on the same subnet as your Windows PC. If not, the data will go through your router, which will slow things down slightly.
- Obtain an account on the Linux server.
- Download and install putty and the public domain releases of Xming (non-Mesa), and Xming fonts (optional).
- If your IT department uses a firewall to block connections between computers within your organization, you may need to contact them to make an exception. Alternatively, if you can find a port that IT doesn't block, you can use that port to connect to the Linux server. This step is only necessary in organizations where IT exercises totalitarian control over your network, such as at one of our remote branches. In extreme cases, you can do what we did, which is to run your own cables and create your own local network that is free from their control.
- Start XLaunch.
- Start a putty SSH session.
- Start imal.

Imal running in Windows XP using Xming
OS X and Linux users - setup and usage
Non-Windows users do not need to install putty or Xming. From
the command line, type
ssh -X 192.168.111.222 or
ssh -p port_number -X 192.168.111.222,
substituting the IP address of your Linux server for 192.168.111.222.
Use the second command if you need to use a non-standard port to get around a firewall.
If you are at the remote branch of our organization, get the port number from Tom.
Note: Problems sometimes occur if one computer is using a 64-bit operating system and the other is using a 32-bit operating system. This appears to be a X Window problem, because it occurs with all X applications. So far there is no workaround.
Windows users - usage
To begin an image analysis session, you first connect to the server using Xming and putty. Then start imal on the server. The display will appear on your Windows desktop, but the working directory will be your home directory on the server.
Step 1: Start Xming.
- Click on the Xlaunch icon.
- Select Multiple windows and Display number 0.
- Select "Start no client".
- For Parameter Settings, accept the defaults..
- Click Finish.
- A large black X should appear on your Taskbar. This indicates that Xming is running.
Step 2: Start Putty.
- Click on Putty.exe icon.
- Click on the [+] next to SSH at left to expand it.
- Click on X11.
- Check the box that says, "Enable X11 forwarding". Don't click Open yet.
- Click on Session in the left panel.
- Under Host Name, enter the IP address of the Linux server.
- If you have to use a non-standard port, change the port number from 22 to the desired port number. Leave the other settings the same.
- Click Open. A black ssh terminal window should appear, saying
login as: - Type your username and press the Enter key.
- Type your password and press the Enter key.
- It should say something like:
your_server_hostname:/home/your_username$, for example:diarrhea:/home/joeshmoe$, or just/home/joeshmoe>. This means you are logged in on the server and can start a program.
Step 3: Start Imal.
- Type
imalin the black ssh terminal window and press the Enter key. The image analysis program should start. You could also typeimal&. This would free up the terminal in case you want to type some Unix commands. - You can make the imal window larger or smaller by dragging on the lower right corner. In imal, images are shown in their original size. Up to 512 images can be displayed simultaneously.
- The manual is available online at http://randombio.com/imal-manual/index.html
II. Using andLinux
This is the alternative method. Use this method if there is no Linux server on your network. Using this method, you install a complete minimal Linux system on the Windows computer. This is very easy to do. The program runs moderately fast, but it has some limitations, and you need to understand some basic Unix commands to run it. (Don't be intimidated by the number of steps below--I'm giving the procedure in excruciating detail.) The main limitation is that you can only run certain versions of Imal. But appearance-wise, it's more like a native Windows program.
Installation
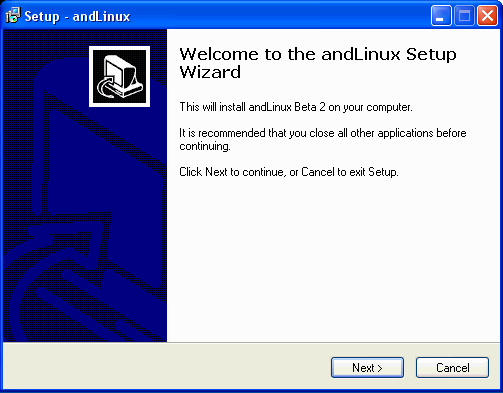
Download and install andLinux on the Windows box. There are two versions: the graphical KDE version and the minimal, text-mode FLTK version. I recommend the FLTK version. During installation, it asks a number of questions. Don't deviate from the answers shown here--many options don't work. Other options will only work once, and fail to work ever again if you uninstall andLinux and re-install it.

andLinux setup screen
Installation Options
- Version to install: 0.7.4
- Memory size: 512 MB
- Install Xming: yes
- Different resolution: no
- Enable sound: yes
- How do you want to start? Run andLinux automatically as a NT service + use Windows shortcuts (see Problems below).
- Next it will ask for a username and password. Enter your Windows username and create a password. It can be the same or different from your Windows password, but make sure it contains only letters and digits and not punctuation marks, otherwise andLinux may get confused and you will have to re-install it.
- How do you want to access your Windows file system? CoFS (this is the only one that works).
- Folder to mount via CoFS: C:\ (or better yet, browse to Documents and Settings and set it to mount your desktop. Whatever you put here will be visible as a "~Windows" directory).
- Create shortcuts: Next
- Select additional tasks: Next
- Install
- TAP-Win32 Adapter V9 has not passed Windows Logo testing: Continue Anyway, what the heck, what could happen.
- Reboot
Setup
These additional steps only have to be done once.
- If you set up andLinux to start manually, click on the "StartandLinux" icon. AndLinux will start in the background. If you set it to start automatically, this icon will not be present.
- Click on andLinux console (NT). It will start booting up linux, then say "andLinux login:". If not, press Enter.
- Log in by entering your username and password.
- Set the root password by typing
sudo sufollowed by your password. Note the command prompt has changed from '$' to '#'. This means you are "root" or administrator. You should only make changes as root if you know a great deal about Unix. However, it's important to set the root password for security purposes. Typepasswdand enter a good password. Then type 'exit'. - Copy or download the static 32-bit version or the Nomotif 32-bit version of Imal
(formerly known as tnimage) into your home andLinux directory.
A version of the program known to work is
http://randombio.com/tnimage-nomotif-for-andlinux . The complete package,
including the manual, is located at
http://randombio.com/unix/old-versions/tnimage-3.2.20c.linux.nomotif.tar.gz .
Once you download it, you can copy it to your andLinux home directory
using sftp or by using Midnight Commander, which is a clone of an
old DOS program called Norton Commander. The latter method is recommended, as it is a
good way to get familiar with how the files are organized.
Move tnimage to your home directory using mc by following these steps:
- Type
mc. - In mc, use the cursor keys to go to ~/windows, Documents and Settings, the directory with your Windows login name, then Desktop.
- Scroll down until imal or tnimage is highlighted, they press F5 to copy it.
- Press F10 to quit. (Depending on how you set up andLinux, F10 may or may not work.)
- You can also use the Tab key to switch from the left to right panel.
-
tar -xzvf tnimage-3.2.20c.linux.nomotif.tar.gz -
cd tnimage-3.2.20c - To start the program, you would type:
./tnimage &(don't do this yet).
- Type
- Type
chmod a+x imalorchmod a+x tnimage, otherwise it will say "Permission denied" when you try to run it. - Note: Don't install the DOS version of tnimage by mistake. This version will not run in andLinux.
Before starting imal for the first time, it's necessary to change one of the X11 keymapping files, or you won't be able to add any text. (This is not an imal problem, but a problem with Motif, the windowing system that imal uses.)
- Log in and become root on the andLinux terminal by typing "su".
- Create a directory named
/usr/X11R6/lib/X11by typingmkdir /usr/X11R6,mkdir /usr/X11R6/lib, andmkdir /usr/X11R6/lib/X11as needed. Since Unix is case-sensitive, you must use the exact capitalization shown here. - Type
cd /usr/share/X11 - Type
cp XKeysymDB /usr/X11R6/lib/X11(be sure to use this exact capitalization). - Type
exit
Starting up andLinux and opening a console window
- With the above steps, andLinux will start automatically at boot-up. If andLinux isn't running, click on the black and white "Start andLinux" icon. The screen will blink.
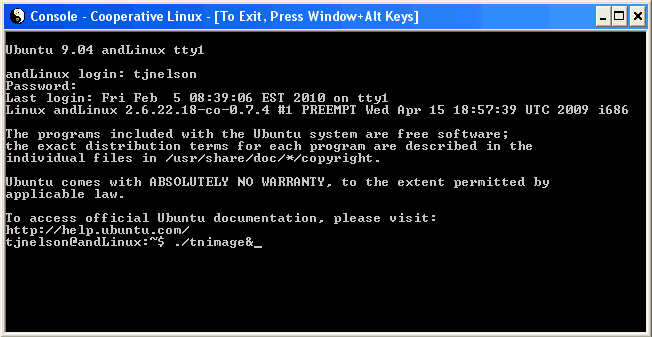
- Click on one of the "andLinux Console" icons. A black console window will appear. If you don't see the "andLinux login:" prompt after a few seconds, try resizing the window or pressing Enter.
- Type your username and password and press Enter. (As is the custom in Linux, characters are not echoed to the screen when you are entering your password. This is normal. Continue typing your password anyway and press Enter.)

andLinux console
Running imal
- Type
./imal &or./tnimage &in the black Console Window. - If it says, "error while loading shared libraries", it means you have to use a different version of imal. The static tnimage version 3.3.20c is known to run in andLinux.
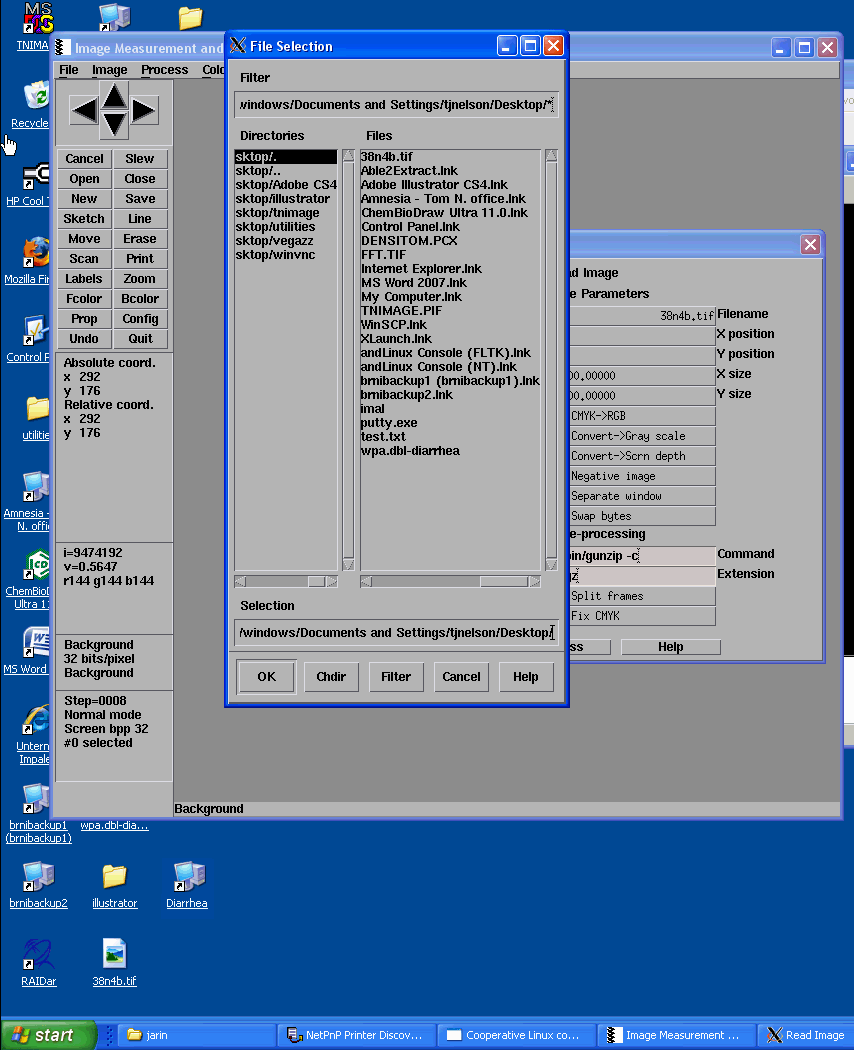
- To open an image file, drag it to your desktop and open it using the tnimage or imal menus. Just clicking on the image doesn't work. Likewise, just clicking on the program's icon doesn't start it--you can only start Unix programs within the andLinux environment.

Imal running in Windows XP
Problems with andLinux
- The libraries in andLinux are quite old, so it's unlikely that most Linux programs (including imal) will run unless they're statically linked. (This is a pain for programmers to do, because of limitations of gcc).
- The command line version of andLinux only works if you've never installed andLinux before. Something gets messed up by the uninstallation program, which doesn't completely uninstall it.
- Programs run a little more slowly in andLinux than in Linux. This is because andLinux is not native Linux, but only an emulator, and it has to perform extra tricks to update the display.
- Problem: If andLinux says, "Can't open display: 192.168.11.1:0.0", this means
it is not starting properly. This happens if you un-install andLinux and install
it in manual start mode.
Solution: Re-install andLinux in automatic start mode. - Problem: andLinux cannot see Windows network drives or Samba shares.
Solution: Copy the files you need into your Windows Desktop before starting. - Problem: “andLinux” is a stupid name.
Solution: Not much I can do about that. - Although you can run utilities (such as gunzip) on Windows files, for some reason, it has to be done manually in andLinux--the automatic unzip function in Imal doesn't work for some reason. If you have an image that is compressed with gzip, un-compress it manually before opening it.
