How to Repair Broken Eyeglass Frames
Here's the procedure for repairing metal eyeglass frames.
This will take about 5 minutes for the actual repair, 10-15 minutes
to polish the metal, and about six hours to find the screws to
reassemble the eyeglass frames.
The cost of the materials is about the same as the cost of having
a single repair done by a professional. If your glasses break more
than once, repairing it yourself as shown here will be cheaper than
taking it to a repairman.

January 1, 2004; updated Apr 05, 2020
|
1. Soldering
- Clear some space on your workbench, like this.
This will make it much easier to work.

- Assemble the supplies.
For all practical purposes, it's impossible to create a
strong joint by butting the two ends together by soldering.
Therefore, we will use a small piece of metal to reinforce
the broken area. The ideal thing to use is a short
piece from an old pair of glasses, ideally made of
the same metal. Alternatively, part of a metal bobby
pin, piano wire, or any other flat piece of spring steel,
may be used. Most eyeglasses are made of silver-nickel or
gold-plated steel, which are easy to solder.
Nowadays, more and more eyeglass frames are made of titanium.
Titanium is probably the best metal for eyeglasses because it's
42% lighter than steel and has the same thermal expansion coefficient
as glass. However, titanium is impossible to solder. Titanium is
usually alloyed with vanadium and aluminum, which make the alloy
stronger. Titanium, vanadium, and especially aluminum form surface
oxides that make it difficult for solder to adhere to them. They
must be brazed or welded.
Some other types of eyeglass frames are too springy to solder
effectively. The problem here is that the solder is not as flexible
as the underlying metal, and the joint eventually works loose or
cracks when the frames are flexed too many times. These
frames must also be brazed or welded (see below).
You also need a two-inch piece of 24-gauge copper wire.
-
Unscrew the side-arm from the frame. If it can't be unscrewed,
carefully remove the lenses and place them aside. Remove the
plastic earpiece so it doesn't get burnt. Use sandpaper to
thoroughly clean both pieces. Touch the pieces only with
forceps, not with your fingers. Grease from your fingers, dirt,
corrosion, or any coating on the metal will result in a
weaker joint or prevent the pieces from sticking.

The side-arm in this example was not completely broken,
but contained a weak area at the point where the metal
becomes narrow. This made it possible to use a single
clamp instead of two clamps.
- (Optional) Use a file to cut some diagonal grooves or
shallow scratches on the inside face of the small
reinforcing piece. This will create a small space between
the parts so the solder can flow between them and act as
a glue, which will make the repair stronger.
- Clamp the reinforcing piece to the inside of the broken
arm using one or two small alligator clips (available from
electronics stores). Wrap the copper wire around
both pieces to hold everything together.


- You will need some silver core solder, flux, and
a lighter. Make sure the solder and the flux both
say "lead-free". The temperature of the torch is high
enough to evaporate lead. If you use solder that contains
lead, not only will the repair not work, but you and
everyone in your house will also get serious lead poisoning.

If your eyeglass frames are made of gold-plated metal, use
gold solder (available from a jeweler's store or various
Internet sites) instead of silver solder if you want the
colors to match.
- You will also need a propane torch. Keep it far away
from flammable solvents like acetone, as shown here.
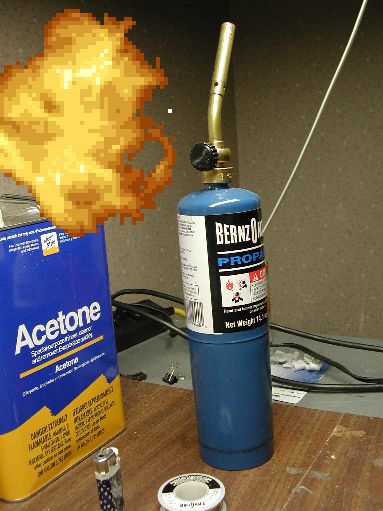
Naturally, a smaller torch would be better.
- Put some flux on all sides of the assembly. The amount
shown here is more than is needed, but excess doesn't
cause any harm. The flux prevents oxygen from oxidizing
the metal, which would prevent the pieces from sticking.

- Heat the assembly for about 1 second, touching solder
to the top part. Keep the solder behind the assembly to
minimize direct exposure of the solder to the flame. The
solder will be melted by the metal and will be sucked between
the pieces by capillary action. The clamps can be removed if
desired to prevent them from being ruined by the solder.
Warning: don't heat near a joint. Many frames
are held together by brazing and heating it will cause
the pieces to come apart.

- If the piece is not entirely covered with solder,
remove the copper wire and add the clamps above and
below the soldered area. Add more flux and apply the
flame again. The piece should be completely and evenly
covered with solder. If the copper doesn't come off,
cut the ends and leave it in place.
- Remove any rough edges or leftover copper wire with
a file and sand the metal first with 220 grit alumina
sandpaper, then with 600 grit sandpaper.

The piece should look like this, with a convex bead
of solder at both ends of the piece. There shouldn't
be any solder on the outside of the piece. Once this is
polished, the reinforcing piece will not be noticeable
from the outside.
- If desired, the metal can be polished using the
items shown here: a buffing wheel, a stick of polishing
compound (left), and high-gloss polishing compound.
Note the goggles, which are essential during this step.
A Dremel tool with a small buffing wheel can be used
instead of a buffer; however, only use the lowest
speed on the Dremel tool, otherwise the piece will
heat up and ruin the joint.

Polish the end of the eyeglass arm so the plastic earpiece
easily slides back. Thoroughly clean everything before
touching your lenses. The buffing compound will easily
scratch plastic as well as glass lenses.
Update: I found that hand-polishing with a product
called Mother's Aluminum Polish works even better.
2. Brazing
Eyeglass frames can also be repaired by brazing. Brazing produces
a much stronger repair than silver solder. Your eyeglasses will be
almost indestructible.
The supplies that are needed are:
- A propane torch. A propane-air torch can heat small items to
a high enough temperature to melt brazing rod. For larger
items, you would need to use something hotter, such as
propane-oxygen, MAPP, MAPP/oxygen or even acetylene.
But propane/air is ideal for very small items. The MAPP
torches available in hardware stores are often useless,
because they only have two settings: ``off'' and ``incinerate''.
- Brazing rod. There are many types of brazing rod, including:
- Bronze brazing rod -- for steel, cast iron, copper
base metals, but not stainless steel. Tensile strength = 60,000 psi.
Working temperature
= 1620°F. This type is slightly easier to work with and
has a yellowish color useful for gold parts. White flux coating.
- Nickel silver brazing rod -- for carbon and alloy steels
including stainless steel
as well as non-ferrous metals. Tensile strength = 85,000 psi.
Working temperature = 1680°F. This type is stronger and
has a silver color. Blue flux coating. Silver brazing rod is more
expensive but flows into cracks better than bronze. Be sure
the rod does not contain cadmium. Requires a higher-temperature
torch in order to melt.
- Aluminum brazing rod -- suitable for brazing aluminum.
Working temperature = 750°F.
- Proprietary alloy brazing rods are available with tensile
strengths up to 100,000 psi.
- Phosphorus copper brazing rod -- suitable for copper and
copper alloys. Tensile strength = 40,000 psi. Working temperature =
1450°F. This type is easily melted by a propane torch.
The most convenient is the type that is coated with flux.
A smaller diameter rod is preferred when using a propane
torch, because it's easier to melt.
- A hands-free clamp.
Procedure
- Disassemble the part as much as possible to avoid damaging
the lenses or any small screws.
- Clean all the parts with a wire brush. Make sure the
metal does not contain any toxic coatings, such as lead,
cadmium or zinc. If the metal is galvanized, brazing should
be carried out in a fume hood.
- Clamp the parts into position using a hands-free clamp.
Leave a very small gap (less than 1 mm) between
the pieces to allow the metal to flow into.
- Heat the brazing rod first until the flux starts to melt. The flux
should flow over the parts as a clear watery liquid.
- Next heat the parts until they are orange-hot.
If the parts cannot be made hot enough to appear orange, they
are too big. If you clamp it too closely to a large metal
object like a vise, it will conduct heat away too fast,
making it impossible to heat to a sufficient temperature.
- The brazing material will eventually melt and be sucked between
the parts by capillary action. The hottest part of the flame
is the clear area just beyond the inner blue flame. The blue flame
itself should not touch the metal.
- Wait for the parts to cool in air several minutes before cooling
with water.
- Remove the flux by sanding or wash in 30% sulfuric acid.
- File any rough edges and polish it.
The disadvantage of brazing is that heating steel to this
temperature can weaken it. For example, heating a spring is likely
to cause it to lose its springiness. Clamp something solid around
the piece to prevent heat from being conducted to any screw holes
or springs. Be careful not to heat near brazed joints (such as the
nosepiece) or the existing joint may come unbrazed.
Also, the metal should be heated just enough to make
a good bond. This is not a major problem for the titanium or
silver/steel alloy used in most eyeglass frames, because tensile
strength, resistance to bending, and modulus of elasticity
(springiness), are more important than hardness. For other
types of steel, the rate at which the steel must be cooled
depends on the type of steel and the properties needed.
Some grades of steel have to be quenched in a salt or oil
bath or annealed by gradually lowering the temperature.
Carbon steel can also decarburize at high temperatures, which
will reduce its hardness.
Needless to say, brazing should always be done in a well-ventilated
area. Avoid heating brass, which can release zinc fumes. Brazing small
parts, unlike welding, does not release significant amounts of
carbon monoxide. Avoid brazing rods containing cadmium.
3. Welding
The ideal method for repairing eyeglass frames, especially those
made of titanium alloy, is welding. This requires special equipment
similar to that used by dentists. Welding is beyond the scope of
this document.
Update (Nov 28, 2010)
Ilia Jerebtsov writes that silver soldering did not work for
his eyeglass frames. It seems that some types of metal are too
flexible for the solder to stick. However, he was successful with brazing:
A micro-torch, even though the box says it has a flame temp of 1300°C,
won't melt brazing rod, I found out. Apparently the working
temperature is much more important and is often not mentioned. In the
end I successfully used a nickel silver rod with a 1700°C flame / 650°
working torch. It took me just a couple of seconds and about half a cm
of rod to do it.
Something worth noting is that if the frames are half-rimmed, like
mine, the lenses are secured by a nylon string that goes through
little holes. I had to re-drill them after the brazing. I used a 1mm
bit with my Dremel. It's not very hard with the precision attachment
and a magnifying glass. Also, fishing line is a perfectly good
replacement for the string. I was under the impression that you need
some kind of secret glasses wire that only opticians have, but nope,
it's just fishing line.
Update (Apr 05, 2020)
More information on brazing titanium
As noted above, it's impossible to solder titanium—you have to braze it.
I haven't tried brazing titanium myself, but there are now special fluxes
designed for brazing titanium, such as from
superiorflux.com.
This site has pointers on the correct temperature, which is very important.
The flux is supposed to protect it from oxygen. If your titanium oxidizes,
nothing will stick to it and it might even burn.
An alternative is to do the brazing in a welding box filled with argon.
The biggest challenge with eyeglasses is the bridge. Eyeglass frames are
usually made by brazing to start with, so if you heat up one side of a bridge
piece, quite often the heat gets conducted to the other side and you end up
with three or more pieces. This is not to say it's impossible, but you'd need
to take certain precautions before starting:
-
Remove the lenses and any screws and store them in a safe place. Some
frames also contain tiny springs. If the heat from your torch reaches a
spring, the spring can lose its springy properties. There are often also
tiny metal parts which will fly out and get lost when you remove the spring.
Make a diagram and wear goggles.
-
When brazing, 99% of the work is setting it up in a frame and clamping
it so nothing can move. If you're going to do a bridge, you'll need to
clamp some kind of heat sink (aluminum or copper are best) on
it to protect the nose pad and the other side of the bridge. If anything
moves while you're brazing it, your frames will be crooked.
-
If you've never brazed titanium before, buy some titanium from McMaster-Carr
and practice first.
-
The brazing material looks to me like ordinary silver solder.
People used to say brazing aluminum was impossible. Now it's routine.
Flux for brazing aluminum is available and I've brazed aluminum many
times.